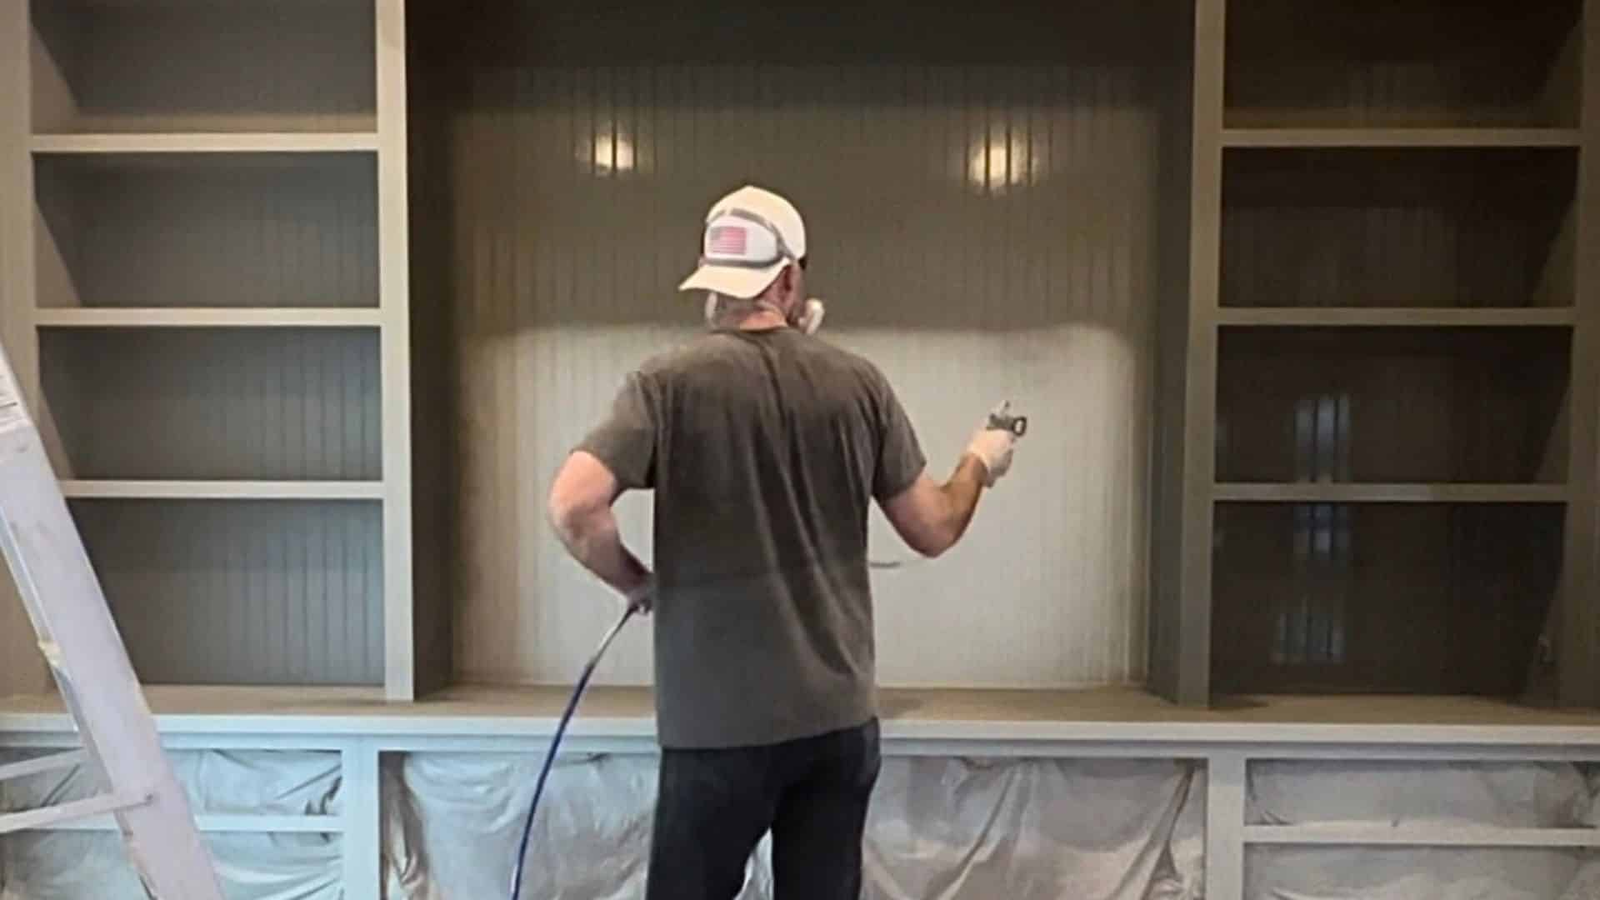
Introduction: Why Cabinet Painting Matters
Cabinet painting represents one of home improvement’s most impactful and cost-effective transformations, capable of completely reimagining your kitchen or bathroom aesthetic. Rather than investing thousands in cabinet replacement, homeowners discover that applying fresh paint produces stunning results rivaling professional refacing at a fraction of the cost. Traditional brush painting, however, leaves behind frustrating streaks, visible brush marks, and inconsistent coverage that undermines even the best paint choices. This is where spray painting technology revolutionizes the process, delivering factory-quality finishes that transform tired cabinets into contemporary focal points. Understanding how to select and use the best paint sprayer for cabinets becomes essential for achieving professional results on your own timeline and budget.
Spray application technology has evolved dramatically, offering homeowners multiple options suited to different skill levels, budgets, and project requirements. Whether you’re tackling kitchen cabinetry, bathroom vanities, or bedroom storage solutions, the right equipment combined with proper technique produces remarkable transformations. This comprehensive guide explores everything necessary to select your ideal sprayer, prepare your workspace, apply paint like a professional, and achieve cabinet finishes that exceed your expectations. By understanding sprayer types, essential features, preparation requirements, and application techniques, you’ll gain confidence to undertake this rewarding DIY project successfully.
Exploring Paint Sprayer Types for Cabinet Work
When beginning your cabinet painting journey, understanding different sprayer categories helps identify which technology best matches your needs, budget, and skill level. HVLP (High Volume Low Pressure) sprayers operate at low pressure levels between 25-50 PSI, directing paint through gravity-assisted flow with minimal overspray reaching surrounding areas. These precision instruments excel at creating smooth, detailed finishes particularly suited to ornate cabinet door designs and intricate woodwork. HVLP sprayers shine when working with specialty finishes like lacquers, polyurethanes, and wood stains that demand careful application and superior finish control. Professional cabinet painters frequently choose HVLP technology because the superior finish quality and material efficiency justify the investment despite slower application speed compared to other sprayer types.
Airless paint sprayers represent the opposite end of the pressure spectrum, utilizing extreme force exceeding 3000 PSI to atomize paint without requiring air assistance. These powerful machines excel at covering large surface areas rapidly, making them ideal for painting extensive cabinet sets or exterior applications where speed matters more than precision. Airless sprayers readily accept thicker paint formulations without requiring thinning, offering flexibility with diverse paint types and viscosities. However, this raw power comes with trade-offs including significant overspray, higher material waste, and more complex surface protection requirements. Budget-conscious painters appreciate airless efficiency, though the learning curve proves steeper than friendlier beginner alternatives.
Electric paint sprayers have democratized spray painting technology, making this professional technique accessible to homeowners without substantial investment or expertise. Cordless electric models offer unprecedented convenience and mobility, eliminating power cord management while providing sufficient performance for standard latex and acrylic cabinet paints. These user-friendly machines feature intuitive controls, minimal setup requirements, and forgiving spray patterns that tolerate technique inconsistencies common among first-time users. Battery technology advances have extended runtime to 45-60 minutes per charge, adequate for substantial project work between charging sessions. Electric sprayers represent the logical starting point for DIYers exploring spray painting for the first time, combining accessibility with respectable results that build confidence for future projects.
Essential Features That Define Your Ideal Sprayer
Selecting the best paint sprayer for cabinets requires evaluating multiple technical specifications and practical characteristics directly impacting your project success and satisfaction. Pressure control stands as perhaps the most critical feature, determining spray pattern quality, paint atomization consistency, and overspray management throughout your application work. Variable pressure settings allow you to adjust sprayer intensity based on paint type, cabinet surface complexity, and desired finish quality. Lower pressure settings create finer, more controlled patterns perfect for detailed cabinet doors and ornate designs, while higher pressure enables faster coverage on expansive flat surfaces. Understanding your pressure requirements before purchasing prevents acquiring equipment that frustrates your specific painting style and project needs.
Spray pattern quality directly influences your ability to achieve uniform, professional-looking cabinet finishes without visible lines or coverage inconsistencies. Premium sprayers offer multiple nozzle options and adjustable fan patterns, allowing transitions between fine precision work and broader coverage zones as your project requires. The consistency of spray output matters equally—streaky or pulsating patterns indicate quality issues that will compromise your entire painting experience. Coverage rate, typically measured in square feet per minute, affects project timeline and overall efficiency. HVLP sprayers usually cover 50-100 square feet per minute, while powerful airless machines reach 200-400 square feet per minute. For cabinet applications, moderate coverage speed combined with superior pattern control typically outperforms raw speed that requires extensive cleanup and material waste.
Paint compatibility and material acceptance establish critical boundaries determining which sprayers suit your specific cabinet finish plans. Different sprayer types accept different paint viscosities and formulations—HVLP sprayers typically require substantial thinning while airless alternatives handle standard latex paints without modification. Electric sprayers usually fall between these extremes, accepting some paint types with minimal thinning requirements. Specialty finishes like lacquers, conversion varnishes, or automotive-grade coatings demand professional-grade HVLP equipment and technical expertise most homeowners lack. Always verify your chosen sprayer explicitly accepts your intended paint type before committing to purchase, preventing mid-project incompatibilities and finish failures. Maintenance accessibility and equipment longevity represent practical considerations frequently overlooked during initial purchase decisions.
Preparing Your Cabinets for Optimal Results
Thorough cabinet preparation establishes the foundation for spray painting success, determining whether your finished project achieves professional beauty or disappoints through adhesion failure and premature deterioration. Begin preparation by removing all cabinet doors from hinges and detaching hardware including handles, knobs, and hinges. This seemingly time-consuming step actually accelerates your overall timeline by eliminating awkward angles and obstacles that complicate spray application. Carefully label door locations using painter’s tape and permanent markers, ensuring confusion-free reassembly after paint completely hardens. Label each door’s position clearly before removing—this simple practice prevents hours of frustration matching doors to openings during final assembly.
Comprehensive cleaning removes accumulated grease, dust, and grime that prevent proper paint adhesion and cause premature finish failure. Kitchen cabinets particularly accumulate persistent cooking grease despite regular cleaning efforts, creating invisible barriers between paint and wood surfaces. Use TSP (trisodium phosphate) or commercial degreaser, scrubbing thoroughly then rinsing completely until all residue disappears. Allow surfaces to dry thoroughly—moisture interferes with paint adhesion as severely as grease contamination. Sand all surfaces lightly using 150-220 grit sandpaper, roughening the finish sufficiently for paint bonding without oversanding or damaging underlying wood. This subtle texture preparation proves essential for adhesion regardless of existing finish condition. Finally, wipe all sanded surfaces with tack cloths, removing dust particles that would otherwise become trapped in your fresh paint, creating noticeable imperfections.
Workspace setup and protection deserve careful planning, consuming 30-60 minutes but preventing catastrophic overspray damage requiring extensive remedial work. Protect surrounding areas extensively with plastic sheeting and painter’s tape, understanding that spray overspray travels farther than most expect and settles on unprotected surfaces permanently. Tape off electrical outlets, wall trim, baseboards, and adjacent surfaces before covering walls and flooring with plastic sheeting secured with painter’s tape. Establish excellent lighting throughout your workspace—poor visibility leads to missed spots, inconsistent coverage, and visible finishing defects under normal home lighting. Paint selection requires equal attention, choosing cabinet-specific formulations like enamel or semi-gloss acrylic that provide durability and aesthetic appeal superior to standard interior paints. Test your chosen paint with your specific sprayer before committing to full project execution, ensuring compatibility and verifying appropriate viscosity characteristics.
Mastering Spray Application Techniques
Professional-quality cabinet finishes depend less on equipment capability than on your personal spray technique, patience, and commitment to proven application methods. Before touching a single cabinet door, invest quality time testing your sprayer setup on scrap plywood, cardboard, or test panels that reveal spray characteristics without risking visible surfaces. Establish ideal pressure settings and spray distance for your specific machine, typically 6-10 inches depending on sprayer type, then practice smooth trigger control and consistent motion. Observe your test spray closely, adjusting pressure and distance until coverage appears uniform without drips, runs, or thin spots. Document these ideal settings and reproduce them consistently throughout your entire project. This preparatory testing investment prevents catastrophic mistakes on visible cabinet surfaces while building personal confidence in your equipment handling.
The fundamental spraying motion involves smooth, overlapping passes covering all cabinet surfaces evenly without visible lines or uneven coverage. Start at the top of each cabinet face, working downward in systematic patterns ensuring no missed spots. Maintain consistent distance from the surface throughout each pass, using your arm to move the spray gun while keeping wrist angle constant. Begin spraying before reaching the cabinet surface, continue smoothly through the pass, and finish spraying after leaving the edge—this technique prevents paint accumulation at pass endpoints that creates visible lines. Overlap each pass by approximately 50 percent, allowing new spray to blend seamlessly with previous applications. Apply thin, even coats rather than attempting complete coverage in single passes; multiple thin applications produce superior results compared to single heavy coats prone to drips and uneven curing. Most cabinet projects require two coats for proper coverage, with light sanding between coats smoothing dust particles and imperfections.
Cabinet doors and frames present unique application challenges requiring thoughtful approach planning and adapted techniques. Spray cabinet doors flat whenever possible, using sawhorses, painter’s easels, or improvised stands positioning doors horizontally for simplified application and gravity-assisted paint flow. Horizontal orientation prevents drips and runs that plague vertical application while maintaining spray pattern consistency. Spray door faces completely before attempting edges or rear surfaces, maintaining consistent angle and distance throughout. When painting door edges, reduce trigger pressure and approach the edges carefully—overspreading edges with excessive paint creates visible lines when doors reattach to your cabinet frame. Cabinet frames and interior surfaces deserve attention even though rarely visible, maintaining consistency and preventing water damage or staining from overlooked areas. Interior shelf spaces benefit from light spray application preventing staining while maintaining your project’s completeness.
Choosing the Best Paint Sprayer for Your Situation
Selecting the best paint sprayer for cabinets demands careful consideration of your specific needs, budget constraints, skill level, and anticipated future usage patterns. Budget-conscious homeowners tackling single cabinet projects benefit from cordless electric sprayers priced between $150-$400, offering accessibility and ease of use that builds confidence for DIY painting. These entry-level machines deliver adequate performance on standard latex and acrylic cabinet paints while remaining affordable enough for experimentation without devastating financial risk. Their forgiving spray patterns tolerate technique inconsistencies common among first-time users, making successful results achievable even without substantial painting experience. Electric sprayers represent the ideal starting point for most homeowners, combining reasonable cost with respectable results that rarely disappoint when proper preparation and technique combine effectively.
Mid-range sprayers priced between $400-$700 offer substantially improved performance, durability, and versatility for serious DIY painters planning multiple projects across several years. These machines provide better spray pattern consistency, improved pressure control, and component quality suggesting extended equipment lifespan compared to budget alternatives. Mid-range HVLP and airless sprayers handle varied paint types more flexibly, accepting latex, enamel, and limited specialty coatings within their specifications. These sprayers deliver results approaching professional quality while remaining accessible to committed DIYers without professional-level financial investment. Equipment rental represents an intelligent middle-ground option, allowing access to quality sprayers for $30-$75 daily without permanent ownership commitment. For one-time cabinet projects, equipment rental often represents superior value compared to equipment purchase, particularly when professional-quality results matter more than ownership permanence.
Professional-grade sprayers exceeding $800 investment suit dedicated enthusiasts, small contractors, or property managers planning extensive painting work across multiple properties and years. These machines feature industrial-quality construction, advanced controls, and component selection ensuring reliable operation through thousands of hours of continuous use. Professional equipment delivers exceptional finish quality and remarkable versatility, handling virtually any coating type or viscosity within designed operating parameters. Most homeowners cannot justify professional-grade investment, as purchase price typically exceeds cost savings compared to professional painting services for single-project scenarios. However, genuine long-term painting commitment makes professional equipment increasingly justifiable through decades of reliable service and consistent performance.
Avoiding Common Mistakes and Maximizing Results
Experienced spray painters identify specific mistakes repeatedly compromising first-time results, helping newcomers recognize and avoid these preventable pitfalls. Overspreading paint—applying excessive material creating drips, runs, and heavy accumulation—ranks among the most frequent errors, resulting in uneven surfaces and finish defects. Combat this by applying multiple thin coats rather than attempting complete coverage in single applications. Excessive sprayer pressure amplifies this tendency, making proper pressure adjustment absolutely critical for success. Most beginners instinctively use excessive pressure, believing more force improves coverage when actually fine-tuning pressure reduces overspray and dramatically improves finish quality. Improper preparation ranks equally high among common failures, with skipped cleaning or insufficient sanding leading to adhesion problems and premature paint peeling.
Advanced spray painters employ refined techniques elevating results from merely acceptable to genuinely exceptional. Back-spray technique involves quick reverse trigger activation just before and after each pass, minimizing paint accumulation at pass boundaries where lines typically appear. Feathering technique employs light pressure and reduced spray volume during overlapping passes, creating gradual blending between application zones that disappears completely. Multiple ultra-thin coats build superior finishes compared to fewer thick coats, despite requiring additional time investment. Each thin coat dries quickly and accepts subsequent applications without hesitation, while thick coats risk running and uneven curing. Professional painters often apply 4-5 thin coats for exceptional cabinet finishes, understanding this investment produces results justifying extra effort and patience. Allow adequate drying time between coats—consult your paint and sprayer combination’s specifications, as drying times vary dramatically between water-based latex and oil-based enamels.
Long-term cabinet finish preservation requires appropriate maintenance protecting your investment through years of use. Regular cleaning with mild soap and water removes dust and grime without damaging protective coatings. Avoid excessive moisture and abrasive scrubbing that degrades paint finishes. Kitchen cabinets benefit from quarterly maintenance cleaning and occasional polish applications restoring shine while adding protective layers. Address drips, spills, and stains immediately before they set permanently into paint surfaces. Touch-ups using identical paint formulas maintain color and sheen consistency, preserving your cabinet’s cohesive appearance. Store remaining paint appropriately, sealing containers tightly and maintaining cool temperatures preventing separation or degradation. Quality cabinet finishes reward proper maintenance with years of beauty and durability, justifying the effort invested in preparation and application.
DIY versus Professional Painting: Making Your Decision
Evaluating whether DIY spray painting or professional services best serves your situation requires honest assessment of your skill level, available time, budget flexibility, and project complexity. DIY cabinet painting requires investment in spray equipment, protective materials, paint, and consumable supplies including sandpaper and painter’s tape. Quality sprayer purchases range from $200-$800 depending on machine type and quality level. Paint, primer, and consumable supplies typically cost $150-$300 for average-sized kitchen cabinets. Total materials investment usually totals $400-$1,200, representing substantial savings compared to professional cabinet refacing or replacement costing $5,000-$15,000. However, consider hidden costs frequently overlooked including workspace preparation, extensive masking, and overspray protection materials. Mistakes requiring repainting multiply costs substantially—failed finish attempts force additional paint and material purchases compounding financial impact.
Professional painters deliver superior finishes through experience, technique mastery, and equipment investment most homeowners cannot justify. Their intimate familiarity with paint types, sprayer capabilities, and surface preparation produces results indistinguishable from factory finishes. Professionals achieve consistency across all cabinet surfaces, eliminating the common DIY problem of varying coverage quality between sections. Their expertise identifying and correcting mistakes prevents permanent finish damage requiring extensive remedial work. Time constraints frequently make professional services justifiable—professional painters complete typical projects in single days while DIY work often spans multiple weekends. Calculate your hourly time value into the equation; if your time is valuable, professional painters might represent better overall value despite higher apparent costs. Professional cabinet painting makes financial sense when your cabinets feature complex designs, multiple colors, or specialty finishes requiring technical expertise beyond typical homeowner capabilities.
Budget Planning and Equipment Options
Understanding price ranges for different sprayer categories helps align equipment selection with your financial constraints and genuine project requirements. Entry-level sprayers priced below $300 attract budget-conscious consumers and first-time spray painters reluctant to invest heavily before confirming their commitment. These machines typically feature cordless electric or small airless designs with simplified construction and basic controls. Entry-level electric sprayers deliver adequate performance on standard latex paints and acrylic finishes suitable for most homeowner cabinet projects. While cheaper sprayers sacrifice advanced features and durability compared to higher-priced alternatives, they represent excellent value for one-time projects or initial experimentation. The trade-off involves accepting compromises in spray pattern consistency, material waste, and equipment longevity—budget sprayers rarely survive years of regular use, but for homeowners painting once or twice, initial investment justification remains strong.
Evaluating warranty coverage and manufacturer support indicates equipment quality and provides crucial consumer protection against premature failure. Comprehensive warranties covering parts and labor for 2-3 years suggest products designed for extended reliable operation, while limited one-year warranties often indicate minimal manufacturer confidence. Review warranty terms carefully, noting specific exclusions that might limit practical protection. Extended warranty options available for additional fees provide extra peace-of-mind protection, particularly for mid-range and professional equipment. Quality equipment manufacturers provide accessible customer support helping users resolve operational questions and troubleshooting issues. Local authorized dealers frequently offer superior support compared to distant manufacturers, providing valuable expertise and parts access. Understanding expected equipment lifespan before purchasing prevents unrealistic expectations—budget sprayers typically survive 50-200 operating hours while professional-grade machines exceed 5,000 hours with proper maintenance.
Safety Considerations and Environmental Responsibility
Spray painting exposes you to paint fumes, airborne particles, and chemical hazards requiring comprehensive personal protection and environmental awareness. Proper respirators represent your first line of defense—not simple dust masks but genuine respirators rated for paint vapor and chemical fumes. N95 masks filter particles but not chemical vapors, proving insufficient for spray painting applications. NIOSH-approved respirators rated for your specific paint type provide genuine respiratory protection. Always verify mask rating compatibility with your paint formulation before beginning work. Safety glasses or goggles designed for chemical splash protection prevent paint overspray from contacting sensitive eye tissues. Chemical-resistant gloves prevent prolonged skin contact with paint, thinners, and cleaning solvents potentially causing dermatitis or chemical sensitivity. Protective clothing including long sleeves, pants, and closed-toe shoes minimizes exposed skin surface area.
Paint fumes present genuine health hazards requiring serious ventilation strategies beyond simply cracking a window. Cross-ventilation involving intake and exhaust airflow dramatically improves indoor air quality during spray painting. Open windows on opposite sides of your workspace, ideally positioning fans to push fumes toward exit windows. Outdoor or garage spraying eliminates indoor air quality concerns entirely, though still requiring respiratory protection for personal exposure. Chemical disposal requires responsibility and environmental respect—never pour paint, thinner, or cleaning solutions into drains or soil. Contact your local hazardous waste facility regarding proper paint disposal options. Many communities operate collection events accepting old paint and hazardous materials. Airless sprayers generate dangerous pressure levels potentially causing serious injury if mishandled. Never point spray guns at yourself or others regardless of whether equipment is activated. Always engage safety triggers preventing accidental discharge before disconnecting or refilling equipment. Inspect hoses regularly for cracks, weak spots, or deterioration indicating failure risk. Failed hoses release pressurized spray violently, creating hazardous situations potentially injuring nearby workers or bystanders.
Conclusion: Begin Your Cabinet Transformation
Selecting the best paint sprayer for cabinets represents your crucial first step toward achieving cabinet transformations rivaling professional results. Whether choosing budget-friendly electric sprayers for initial DIY projects or investing in professional-grade HVLP equipment for extended furniture refinishing, appropriate spray technology dramatically improves finish quality, application speed, and overall project satisfaction. The comprehensive guidance throughout this article should equip you with knowledge necessary for confident equipment selection and successful cabinet painting outcomes. Your specific situation—skill level, budget, project scope, and timeline—determines whether DIY spray painting or professional services best serves your needs. First-time painters should consider rental equipment options providing access to quality machines without permanent investment. Proper preparation, realistic expectations, and patient technique execution distinguish successful projects from frustrating failures. Most homeowners achieve impressive results on their first spray painting project when investing adequate preparation time and following proven techniques.
Cabinet painting represents one of home improvement’s most rewarding projects, delivering dramatic aesthetic and functional improvements at a fraction of professional replacement costs. Beautiful, durable cabinet finishes achieved through quality spray techniques create kitchen and bathroom spaces that inspire daily. Take your first step toward transformation by selecting appropriate equipment, gathering necessary materials, and committing to thorough preparation. Your newly painted cabinets will reward every hour invested in planning and execution, providing years of beauty and satisfaction. The transformation from tired, dated cabinetry to stunning focal points awaits those willing to take action—choose your best paint sprayer for cabinets today and begin your renovation journey toward the kitchen or bathroom you’ve always desired.
You may also read: fire and water damage restoration
Frequently Asked Questions
What Paint Sprayer Works Best for Cabinet Beginners?
Cordless electric paint sprayers represent the ideal starting point for cabinet painting beginners, offering minimal learning curve, straightforward operation, and budget-friendly pricing between $150-$400. These machines feature simple on-off triggers, adjustable spray width, and forgiving spray patterns tolerating technique inconsistencies common among first-time users. Electric sprayers work wonderfully with standard latex and acrylic cabinet paints, accepting pre-mixed finishes without modification. Many beginners achieve professional-quality results on their first projects using quality electric sprayers, making them excellent entry-point equipment for DIY painting enthusiasts exploring spray painting for the first time.
Can Different Paint Sprayers Handle Kitchen Cabinet Paints?
Not all paint sprayers suit kitchen cabinet applications, requiring consideration of paint type compatibility, spray pattern control, and finish quality expectations. HVLP sprayers excel with lacquers, stains, and specialty finishes, while airless sprayers handle latex paints and acrylics effectively. Electric sprayers work best with standard latex and acrylic formulations. Pneumatic sprayers accommodate diverse paint types but require compressed air infrastructure. Verify your sprayer explicitly accepts your intended cabinet paint type before purchasing—forcing incompatible paint through unsuitable equipment damages both the spray gun and your project results.
How Much Time Does Cabinet Painting with a Sprayer Require?
Cabinet painting timeline varies considerably based on project scope, preparation thoroughness, and sprayer type. Typical kitchen cabinet sets require 2-4 hours spray application time, though preparation including sanding, cleaning, and masking frequently requires 4-8 hours depending on condition and complexity. Paint drying between coats typically requires 4-8 hours, and final assembly after complete paint hardening takes an additional 1-2 hours. Most homeowners complete typical kitchen cabinet projects within 3-5 days total timeline spanning multiple weekends, though professionals often finish in single working days through efficiency and accumulated experience.
Should I Thin Paint for Spray Application?
Paint thinning requirements depend heavily on sprayer type and paint formulation, making manufacturer specifications essential consultation before beginning work. HVLP sprayers typically require substantial thinning, reducing paint 20-30 percent for optimal atomization. Airless sprayers usually accept paint with minimal or no thinning, while electric sprayers typically require light thinning around 10-15 percent. Never guess about thinning ratios—consult both your sprayer manual and paint manufacturer’s specifications, conducting test applications on scrap materials before committing to actual cabinet surfaces. Improper thinning causes spray defects and finish problems.
Is Purchasing a Paint Sprayer Worth the Investment?
Paint sprayer investment justification depends on your anticipated future usage and budget flexibility. If you’re painting kitchen cabinets once, spending $200-$400 represents marginal investment compared to $5,000-$15,000 professional refacing or replacement costs. Budget sprayers achieve perfectly acceptable results for one-time projects despite equipment limitations. However, if limited use truly means single-time-only projects, equipment rental at $30-$75 daily represents more economical value than permanent purchase. Consider future painting projects including exterior trim, furniture refinishing, or additional cabinet updates that might justify permanent equipment ownership.
How Do HVLP and Airless Sprayers Differ for Cabinets?
HVLP sprayers operate at low pressure (25-50 PSI), minimizing overspray and producing superior finish quality on detailed surfaces like ornate cabinet doors. These machines excel with specialty finishes like lacquers and polyurethanes but work slower and require paint thinning. Airless sprayers operate at extreme pressure (3000+ PSI), covering large surfaces rapidly and handling thick paints without thinning. However, airless sprayers generate excessive overspray, require extensive masking, and create inferior finish quality on detailed cabinet elements. For cabinet-specific work prioritizing finish quality, HVLP sprayers typically outperform airless alternatives despite slower application speed.
Can Interior Cabinet Painting Work with a Spray Setup?
Indoor cabinet painting requires serious ventilation considerations due to paint fumes and airborne particles affecting air quality and personal health. Proper cross-ventilation using windows and fans improves indoor air quality substantially, though genuine respiratory protection through appropriate masks remains necessary regardless of ventilation. Airless sprayers with extensive overspray prove particularly problematic indoors, requiring extensive masking and protection covering large areas. Garage, basement, or outdoor spraying proves preferable when possible, eliminating indoor air quality concerns. If interior spraying proves necessary, maximize ventilation, use respiratory protection religiously, and accept that some furniture and surfaces will require protection from paint overspray.
What Steps Prevent Cabinet Painting Drips and Runs?
Preventing drips and runs involves applying thin, even coats rather than attempting complete coverage in single passes. Maintain consistent spray distance typically 6-10 inches, use proper trigger control, and adjust pressure to appropriate levels preventing excessive paint application. Overlap passes by approximately 50 percent, creating seamless coverage without paint accumulation at pass boundaries. Allow adequate drying time between coats, and avoid excessive spray pressure creating runs and drips through paint overload. Practice on scrap materials before tackling visible cabinet surfaces, developing technique consistency and trigger control. Most drips result from excessive paint application—multiple thin coats outperform single heavy coats for smooth finishes.
What Paint Formula Works Best for Cabinet Doors?
Cabinet-specific paints like latex enamel, acrylic enamel, or semi-gloss acrylic provide durability and aesthetic appeal essential for kitchen and bathroom cabinets. Water-based acrylic paints offer excellent cabinet compatibility, quick drying, and straightforward cleanup compared to oil-based alternatives. Specialty finishes like lacquer or conversion varnish deliver exceptional durability and appearance but demand professional-grade HVLP sprayers and advanced technique. Always verify your chosen paint accepts your specific sprayer type—different formulations require different equipment. Cabinet paints must resist moisture, kitchen grease, and daily wear, eliminating standard flat latex paints from consideration.
How Often Should Sprayers Receive Cleaning and Maintenance?
Paint sprayer maintenance frequency depends on usage intensity and paint type, though regular cleaning after each use represents best practice extending equipment longevity. Immediately after completing spray sessions, flush your sprayer with appropriate cleaning solvent matching your paint type—water for latex, mineral spirits for oil-based. Disassemble components accessing fluid passages, removing dried paint preventing future spray defects. Weekly deep cleaning involving submersion of internal components maintains optimal performance. Monthly inspections checking for wear, damage, or corrosion identify issues before they compromise equipment functionality. Proper maintenance transforms sprayers from disposable tools into durable equipment lasting years.